Saturday, November 28, 2009

Koi Growth

Koi is a fish that can reach a large size, more than 1 meter of koi has reached by koi keeper in the world. In addition to the size koi also can reach the old age. Hanako is oldest koi ,was reportedly 226 years old upon her death. She was owned by several individuals, the last of whom was Dr. Komei Koshihara. Her age was determined by removing one of her scales and examining it extensively in 1966. She is (to date) the longest-lived koi fish ever recorded. The growth of koi can be assessed based on comparison of the size and age.

Koi have the potential of growing to an enormous size. Interestingly the size of koi is usually measured in terms of their length whereas anglers measure their prize carp in terms of their weight. Jumbo koi are the product of years of selective husbandry, putting large areas of water in the form of mud ponds to one side for just a handful of prized specimens. In fact, probably the greatest single factor affecting the growth of koi is stocking density, with the largest and fastest growing fish coming form large waters.

Not all koi will have the potential to grow to such large sizes as they will not possess the genetic make up to achieve a jumbo size, irrespective of how ideal the growing conditions, depth of koi Pond,Water quality. In fact there is a general rule when considering the ultimate size of koi. Higher grade, complex variety koi (Gosanke) will not have the potential to reach the same size as the less appealing monocolour koi.

This table shows the size of koi growth based on age, not the absolute value but can be used as comparison. Many Factors that affect koi growth. These are :

a. Genetic/Bloodline.
b. Environment (stocking density, temperature, water quality etc) .
c. Food


MonthsInchesYearsCm
00.30.00.7
11.10.12.9
22.00.25.0
32.80.37.1
43.60.39.1
54.40.411.1
65.10.513.0
75.80.614.8
86.50.716.6
97.20.818.4
107.90.820.1
118.60.921.7
129.21.023.3
139.81.124.9
1410.41.226.4
1511.01.327.9
1611.51.329.3
1712.11.430.7
1812.61.532.1
1913.21.633.4
2013.71.734.7
2114.21.836.0
2214.61.837.2
2315.11.938.4
2415.62.039.5
2516.02.140.6
2616.42.241.7
2716.82.342.8
2817.22.343.8
2917.62.444.8
3018.02.545.8
3118.42.646.7
3218.82.747.6
3319.12.848.5
3419.42.849.4
3519.82.950.2
3620.13.051.1
3720.43.151.9
3820.73.252.6
3921.03.353.4
4021.33.354.1
4121.63.454.8
4221.93.555.5
4322.13.656.2
4422.43.756.9
4522.63.857.5
4622.93.858.1
4723.13.958.7
4823.44.059.3
4923.64.159.9
5023.84.260.4
5124.04.361.0
5224.24.361.5
5324.44.462.0
5424.64.562.5
5524.84.663.0
5625.04.763.5
5725.24.863.9
5825.34.864.4
5925.54.964.8
6025.75.065.2
6125.85.165.6
6226.05.266.0
6326.15.366.4
6426.35.366.8
6526.45.467.2
6626.65.567.5
6726.75.667.9
6826.85.768.2
6927.05.868.5
7027.15.868.8
7127.25.969.1
7227.36.069.4
7327.56.169.7
7427.66.270.0
7527.76.370.3
7627.86.370.6
7727.96.470.8
7828.06.571.1
7928.16.671.3
8028.26.771.6
8128.36.871.8
8228.46.872.0
8328.46.972.2
8428.57.072.5
8528.67.172.7
8628.77.272.9
8728.87.373.1
8828.87.373.3
8928.97.473.4
9029.07.573.6
9129.17.673.8
9229.17.774.0
9329.27.874.1
9429.37.874.3
9529.37.974.5
9629.48.074.6
MonthsInchesYearsCm


Reference:
1. http://en.wikipedia.org/wiki/Koi
2. http://www.pond-doctor.co.uk/
3. http://www.rockymountainkoi.com/

Thursday, November 26, 2009

Aeration System For Koi Pond

More fish die from a lack of oxygen than any other cause. To be educated fish keepers we must have a clear understanding of oxygen. We need to know what takes oxygen out of the water and how to put it back.

Oxygen Basics
You and I, your cat, and your canary all breathe air containing 20.9% oxygen, whereas your fish breathe water containing 0.0008% oxygen! They have evolved to be comfortable with that amount, but at 1/2 that amount, 0.0004%, they are hurting!

In garden ponds, we typically see oxygen problems only during the summer because when the water is warm all those things which consume oxygen speed up increasing their consumption of oxygen. For every 10C there is an approximate doubling of the consumption of oxygen (and production of carbon dioxide). Your fish may be happy and healthy at 20C (68F) and suffering from low oxygen stress at 30C (86F) in the same pond.

Oxygen levels can only be determined by measurement with a test kit or an oxygen meter. Submerged plants and algae take oxygen out of the water at night. Their effect can be significant when you have "green water" (phytoplankton algae and zooplankton).

Oxygen Levels

* Warm water saturation is about 8 ppm
* Continuous healthy minimum is about 6 ppm
* Low level stress and poor feeding response 4-5 ppm
* Acute stress, no feeding, inactivity 2-4 ppm
* Death 1-2 ppm

The above is a guideline only, as duration, water quality, condition of fish, level of other gasses, etc. All have a significant effect.

Low Oxygen Stress
It is important to know you have an oxygen problem long before your fish start dying. You need to either monitor it by periodically measuring it when you expect it to be low or, select and use an aerator large enough to handle the summer time conditions.

If you are stressing your fish, you are making them much more vulnerable to disease, parasites and infection. Their activity level will be reduced as well as their growth rate. Low oxygen levels will lower the oxidation/reduction potential (ORP), favor growth of disease causing pathogens and disrupt the function of your biofilter.

Solution
You can either design and maintain your pond so that oxygen never becomes a problem, i.e., clear water, few fish, little food and clean bottom. Perhaps, use an aerator, at least during the warm periods. Since every pond is unique and conditions, especially water quality and fish quantity vary greatly, I can only give you general guidelines (see oxygen budget). If you are not sure - measure the oxvgen level. Buy or borrow a dissolved oxygen test kit or an oxygen meter. Use it along with your preferred aerator until you are sure that the oxygen level will be maintained.

Aeration
Most fish keepers know they need some type of aeration. But, unless you've studied this science (and who has?) you are probably assuming that your stream, venturi, waterfall, air diffuser or fountain is taking care of your aeration needs. They may be, but are your sure? Almost anything that assists the transfer of oxygen into water could be called an aerator. But, is the aeration effect significant and is the energy expended cost effective? The oxygen content in your pond depends upon the rate of consumption vs the rate of replacement.

Oxygen Budget
The need for more oxygen comes from fish, plant respiration, the chemical and bacterial decomposition of waste matter. If you really want to read the numbers, read the following. Theoretical oxygen budget for a 1.000 gllon (3.800 liter) pond.

1,000 gallons of water at 6 ppm contains about 24 grams of oxygen. 10 lbs. of fish need about 18 grams of oxygen per hour. 1,000 gallons of water with a chlorophyll A of 20 mg/l (light green water), a B.O.D. of 10 mg/l (uneaten food, bacteria, etc.) will consume about 2 grams per hour. Feeding 3% of the fish's body weight per day will add 60 grams of food which contains 24 grams of protein, which converts to about 2 grams of ammonia, which will consume about 14 grams of oxygen in the biofilter. Pollen, bird droppings, leaves, etc. may add 2 more grams. 36 divided by 24 equals 1.5 grams per hour.

This example shows the fish consuming the most oxygen and the biofilter the 2nd largest amount, but be aware that very green water can cause a fish kill in a stagnant, nonaerated pond even if it contains only very few fish!

If you had an aerator maintaining the oxygen level at 6 ppm and you turned it off at 8:00PM, you would lose about 6% (1.5 grams) of the pond's oxygen per hour. By 8:00 AM, the next morning, the oxygen level could be as low as 1 ppm. If your aerator is your fountain, do not turn it off at night.

Aerator Performance
Following is a list of typical Koi pond aerators with estimates of oxygen transfer performance and efficiency. (Assumes 3000, clean water, 70% of saturation, power cost $0.1 0/kwh.)


AeratorFlow rateWatts usedGrams O2 per hourCost per 100 grams
Lazy Stream 12" drop10gpm 150watts 1.2$1.26
Babbling Stream 12" drop 10 gpm 150 2.4 .63
Waterfall 12" drop straigh into pond 10gpm 150 1.4 1.05
Waterfall 2-24" drop fallng on rocks10 gpm 200 3.1.65
Fountain5 gpm 100 1.6 .63
water pump with venturi4 gpm 1004.0 .25
Air compressor linear type 1 1 cfm30 4 $0.06


Summary
Make sure that your fish are not being stressed. If your fish are valuable to you, it is cheap insurance to have two aerators or separate breakers. If one fails, the other will prevent severe fish stress or mortality.

If you are building a pond, design it so you never have to worry about oxygen. Wire it so that your water pump and aerator are served by separate breakers, select energy efficient long life components. Consider that someday you will have a lot of fish, lots of algae, warm water and a broken pump.

Oxygen is the first miting factor in water quality. Ammonia and nitrite take days to reach crisis levels. Oxygen can become critical in a few hours.

Source : http://akca.org/library/aerate.htm

Wednesday, November 25, 2009

COBITIDAE


The Cobitidae are close relatives of the Cyprinidae and are found in both Europe and Asia. They possess
a small number of barbels which they use to detect prey as they search the substrate. Given this
feeding procedure, it is preferable to use a fairly fine, smooth sand. You can recognize these fish by the
presence of a spine under the eye; this is designed for defense, but can also entangle the fish in the hand
net. Loaches, as they are commonly
known, are bottom-dwellers, and basically
twilight species; they hide away during the
day, so you will need to provide lurking
places. They are happy with artificial food,
but will not spawn in the aquarium

Getting Started with Your First Saltwater Aquarium

By taking the time to properly plan your aquarium now, you can save a lot of
time and money down the road. After all, you want to set it up once and set it
up right.
What equipment do I need?
In order to meet the needs of your fish that are highlighted in Table 1-1,
you should buy much of your equipment right from the start. After all, you
can’t bring home any fish from your dealer unless you have something to put
them into.
Part II of the book tells you about the equipment essential to a successful
marine aquarium:
What about brackish water aquariums?
Although most folks reading some books are interested in aquariums that are
strictly salt water, some are interested in aquariums that are not quite fresh
and not quite salt.
How do I set up the aquarium?
 puts all the pieces of the saltwater aquarium puzzle together and
tells you how to set up the system from start to finish. However, unlike the
typical freshwater aquarium, the marine system needs to mature as your
filtration starts to work. Therefore, you really can’t add fish until your aquarium
has had a chance to establish itself over a couple of weeks. How will you
know? That depends on water chemistry.

What’s So Great About Aquariums?


Fish watching
I can watch fish for hours, but, admittedly, I’m a bit strange. Still, the more
you watch your aquarium, the better off your aquarium will be. You’ll get to
know all the subtleties of your fish; you’ll name them; you’ll know about their
individual personalities (oh, they have them); you’ll watch as they interact;
and, most importantly, you’ll know immediately if something isn’t quite right.
Each animal in your aquarium is your pet, and, like any pet, by watching it
daily, you’ll know when it acts normally and when something is wrong.
You can diagnose problems as they arise and not after it’s too late.
Relaxation
Fish and invertebrates are entertaining creatures, and just sitting and watching
them can be very relaxing. As far as I’m concerned, relaxation is one of
the very best reasons to have an aquarium. Studies show that spending time
in front of the aquarium reduces stress. Also, if you have insomnia, try fish
watching — count fins, not sheep.
A fishy family affair
It may sound a bit corny, but fishkeeping is fun for the whole family. By bringing
the kids into the process, you help them learn the responsibility involved
in taking care of pets. Every child will want to feed the fish, and you can show
them how to do it properly. Daily, weekly, and monthly maintenance duties
become easier if they’re shared by all. Also, if everybody has a vested interest
in the aquarium, the aquarium will be better off. In fact, family pets often
get more attention than those owned by a single person.

Ammonia Water Test Kit


Ammonia produced from fish waste & urine, uneaten fish food, decaying plants, and dead insects. In a large amount of ammonia will cause Koi Fish death. High concentration Ammonia in the Pond water will cause the water to be green. So koi keeper needs to detect the ammonia disolved in the water every time with Ammonia Test Kit. An ammonia test kit is considered to be a requirement for all pond keepers. If the ammonia test result was detected in high level , cleaning water needs to be done soon. Cleaning water from ammonia can do by change water partially or good filtration system.

Two types of ammonia test kits are commonly available.

1. Based on the Nessler reagent.
This kit normally uses drops in a water sample with an associated color chart. The Nessler kit provides a faster test but is not compatible with any ammonia treatment chemicals that may be in the water. Nessler kit color chart normally ranges : From clear, meaning no ammonia, to yellow/yellowish-orange as ammonia levels increase.

2. Salicylate Reagent test

Salicylate Reagent Test may use drops, powders, or pills and is usually a two step process again followed by a color chart.The salicylate based test kit ranges from a light yellow, meaning no ammonia, to green/bluish-green as ammonia levels increase.

Both types read the total of ammonia and ammonium, so without knowing the temperature and pH, the toxicity cannot be determined. Suffice it to say that the only good ammonia reading is zero. But note that any pond containing fish will have some residual ammonia. The bio-converter does not remove all of it each pass and the fish continuously add it to the pond. The residual level will be determined by the fish load, the effectiveness of the bio-converter, and how often the water is passed through it. This residual level should not be detectable on the average test kit. The recommended test kit should be able to detect 0-1 ppm of ammonia.
Example Ammonia Test Kit

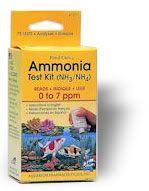
1. Ammonia Test Kit.


Determines the level of ammonia in koi pond, a toxic chemical being constantly produced in the pond from fish waste, uneaten fish food, decaying plants & dead algae.
- Reads ammonia levels from 0 ppm to 7 ppm
- Kit includes a bottle of test solution, glass test tube with cap, instructions & color chart
- Performs 75 tests

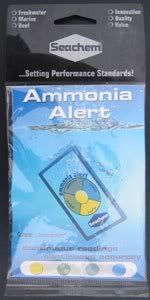
2. Ammonia Allert


Ammonia Alert in-tank test system is an innovative color device for continuously detecting and monitoring toxic free ammonia. A sensor changes reversibly from yellow to green to blue, relative to the ammonia concentration.
No test kits, chemicals, or procedures are needed. The device detects less than 0.05 mg-L (ppm) free ammonia and alerts you to the No. 1 killer before any sign of stress. it lasts over a year and replacement sensors are available. Marine or freshwater use.

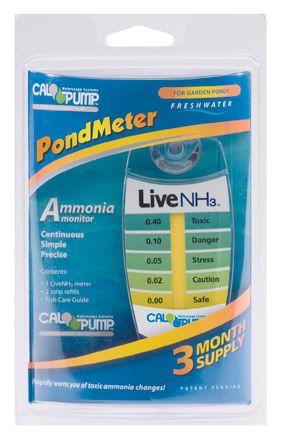
3.CalPump Ammonia Test Monitor


- Contains a Ammonia Master Sensor with 3 Months Supply
- Easy to use
- Suction cup included or use a string to tether in pond or skimmer
- Allows you to monitor your pond water for Ammonia without having to use liquids or strips.
- Just view the monitor and it will give you a constant read.

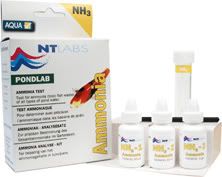
4.NT Pond Lab Ammonia Test kit.


NT Pond Lab Ammonia Test kit Comprises 30 tests .

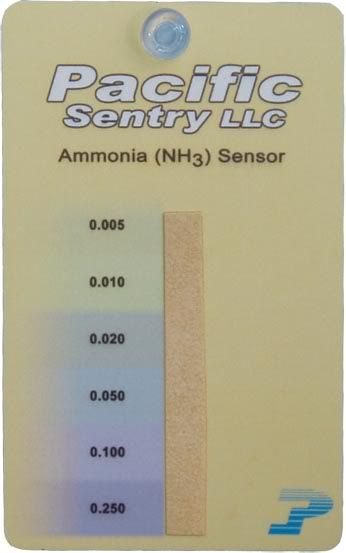
5.Ammonia Aqua Sensor


Pacific Sentry’s ammonia aqua sensor enables visual monitoring of toxic ammonia (NH3) in aquaria water on a continuous basis. Simply attach it in a visible location where it can be left and easily viewed, with the sensor pad completely immersed. With initial use, wait about 15 minutes for the sensor to hydrate before making first reading. Thereafter they respond quickly (1-5 minutes) to NH3. To get a measurement, simply match the sensor’s color to the color-gradient indicator chart to readout the NH3 concentration.

Reference:
1. http://koiclubsandiego.org
2. http://www.nbponds.com
3. http://www.123ponds.com
4. http://www.koilogic.co.uk
5. http://www.pacificsentry.com

Tuesday, November 24, 2009

Water Quality For Best Koi Growth


Koi growth, health and color of are dependent on water condition, the first thing to suspect koi fish problem is water quality. Good water quality comes from the perfect koi pond filter. Daily checking for water quality in the koi pond is very important for the health of Koi. Fresh water are used by some Koi keepers without a Filtration system, but a large amount of fresh water should not be put into the pond at one time. If a quantity of fresh water is entering the pond, the Koi's body system has to adjust to the new water condition. A loss of shine and color fading can be a result of excessive water changes. Carp like to live in the same water condition and environment.

Otherwise water circulated for a long time without change becomes aged and can cause small bubbles and scum in the pond. Most purification systems cannot eliminate 100% of the harmful chemicals such as ammonia. It is suggested that 5% to 20% of the pond water should be exchanged every week and fresh water added. This fresh water should be added in small amounts on a continuous basis, 24 hours a day, to prevent a major environmental change in the pond.


Water Quality Parameter and Koi Behaviour

Water quality can determined by looking at some of the parameters in the water and abnormal behaviour of the fish. Characteristics that appear from Koi behavior of fish is:

- If all the Koi are swimming all over the pond area that is an indication that they are healthy.
- If there any scum on the water surface and are many small bubbles forming, suggest the water is very old or the biological purification system is not working effectively.
- If Koi gathering at the waterfall area indicates that the water is lacking in oxygen content.
- If Koi accumulating in one area and some of them scratching their sides at the pond edges, there is a possibility they are having problems with parasites and the pond should be treated imediately.


Water Parameter In The Koi Pond


1. PH
PH is the single most important water quality parameter. It can affect the toxicity and quantity of several of the other components of koi pond water. Koi can live in a wide range of pH, but 7.2 to 7.8 is ideal. To lower the pH of your pond you can add a water softener, try reverse osmosis, and decrease splash aeration by by-passing the waterfall. To raise pH increase splash aeration, add oyster shells, or lime.

2. Ammonia
Ammonia is toxic to koi fish. As pH increases above 7, the amount of ammonium transformed into ammonia is exponentially
related to the pH. A test for ammonia with water test kits should always read 0.0 PPM. To reduce the toxic ammonia content, make a water change but be sure to add a dechlorinator, decrease feeding amount, add zeolite (never combine with salt additions), reduce fish load, add more filtration area, add a commercially prepared ammonia remover.

3. Nitrites/Nitrous Acid
Nitrites/Nitrous is the first steps in the Nitrogen Cycle. Nitrous Acid (HNO2-) is the by-product of Nitrosomonas bacteria breaking down ammonium in acid water. As pH decreases below pH 7, the amount of nitrous acid increases and becomes more toxic. To reduce toxic nitrous acid, make water changes, reduce the fish load, reduce the feeding amounts or adjust the pH. Add salt at the rate of 0.2% to inhibit the intake by the fish of nitrous acid. A test for these molecules should read 0.0 PPM.

4. Nitrates/Nitric Acid
Nitrates/Nitric Acid is the second step in the Nitrogen Cycle. Unless found in large quantities, both are considered non toxic. To control the amount of nitrates and nitric acid, make water changes or add plants.

5. Water Hardness
Hard water is due to an abundant number of salts such as calcium and magnesium. Koi can cope with a wide range of hardness. There are two major benefits to having hard water in your Koi pond. First, very hard water can bind some toxic metals such as lead. Secondly, hard water reduces the workload of the koi for osmoregulatory functions. A reading of 0 to 75 PPM is considered soft, from 75 to 150 PPM is moderately hard, from 150 to 300 PPM is hard and above 300 PPM is very hard. If it is necessary to increase your hardness you can add crushed oyster shells, coral or any substance that will increase the amount of calcium.

6. Total Alkalinity/ Temporary Hardness
A large amount of bicarbonates in the water will result in a high Total Alkalinity reading. Also knows as 'buffers', these bicarbonates dissociate and then combine with the Hydrogen ions produced by the Nitrogen Cycle and the other acids produced by the fish and organic decomposition. When Total Alkalinity is low, or is 'used', the water will become more and more acid. Combining a low Total Alkalinity with submerged plants or algae can cause a day time alkaline pH and a night time acid pH. This 'pH shift' is stressful to your fish and can lower their resistance to disease if the situation continues. Total alkalinity should be kept above 80 PPM to avoid these potentially dangerous shifts. To increase alkalinity, add sodium bicarbonate, change the water or add a commercially prepared pH Buffer.

7. Temperature
Temperature should be monitored for both daily and seasonal extremes. Temperature affects dissolved oxygen levels, respiration, metabolic rate, pH balance, free ammonia\ionized ammonia ratio and osmoregulation. Koi can tolerate a broad range of temperatures, from ponds that are iced over; to water up to 90F, better than they can tolerate sudden shifts in temperature.
Water temperature has an inverse relationship to the amount of oxygen contained in that water. The higher the water temperature, the lower the oxygen saturation level. The 'saturation level' is the maximum amount of oxygen in water at a given temperature. Water temperature also affects the metabolic rates of the fish. Fish, being cold blooded, slow their bodily functions as temperature decreases. This affects all circulatory systems. If you need to reduce the temperature of your water you can add more shade, add a misting system, bypass the waterfall during the day and utilize the waterfall only at night. To increase your water temperature, add a heater, bypass the waterfall at night and reduce the shade.

8. Oxygen
Oxygen is needed for the normal day to day functions of a fish and by the bacteria necessary for the breakdown of the fish's waste products in the nitrification process. Factors affecting the amount of oxygen in the water are temperature, fish load, organic load, medications, and the turn over rate. All of these factors affect oxygen inversely except the turn over rate. Minimum levels of oxygen should be 5 PPM. To increase the oxygen content, add venturis, increase the turnover rate, reduce the organic load (rid the pond of any organic matter that is sitting on the bottom). Do not add aquatic plants, they will use oxygen at night.

9. Carbon Dioxide
Carbon Dioxide product of koi fish respiration.To decrease the amount of carbon dioxide, add plants or increase bubble aeration. To increase Carbon Dioxide, remove plants and decrease bubble aeration.

10.Chlorine & Chloramines

11.Toxic Metals
Most natural waters contain chloride, sulfate, carbon, calcium, magnesium, sodium and potassium. These ions serve a vital purpose in the mineral metabolism of all animals. If these ions are found in high concentrations, their toxicity is dependent on water hardness, pH, temperature and the presence of other dissolved substances. The solubility and toxicity of zinc, lead, aluminum and copper have a direct relationship to increases of pH and water hardness. To remove heavy metals, use activated carbon filtration.

12. Organic Compounds
Oil and grease, organic carbons, phenolic compounds, and detergents are included in this group. Much of the pollution from these organic compounds is due to runoff entering the pond. Make water changes.

13.Other Toxic Gases
Hydrogen sulfide is the result of anerobic bacterial action on organic matter in the pond. Ozone is being used to disinfect water in some areas. Make water changes and clean out the mulm under the filter or in the bottom of koi pond.

14. Pesticides & Insecticides & Herbicides
These are usually introduced into the pond by runoff, precipitation or accidental spills. Make water changes.

Source:

1.Akca Library

Monday, November 23, 2009

BASIC KOI POND DESIGN

Introduction
This article is a compiation of many koi experts' and enthusiasts' views, with an intermingling of my own views. . Besides collecting data from amny issues of KOI USA and Rinko Magazines, there is reference to Tetra's Koi Encyclopedia and heavy emphasis on Grant Fujita's book. My main goal is to give the koi hobbyist the foundation of what both a Basic beginner's pond as well as an ideal pond should contain. Realizing that not everyone has the space, money, nor ambition to do all that is mentioned in my paper for the Ideal Pond. I at least try to emphasize those things that every koi pond should have to both minimize the maintenance and, even more importantly, to improve the health and quality of their koi.


All of we koi hobbyists have later on wished we had researched the necessities of a koi pond in more depth, or had done something differently the first time around. Do you know anybody in the koi hobby who has not made major changes in their pond or filter after a few years and could kick themselves for not listening to the more experienced hobbyist originally? This is particularly true in not making the pond large and deep enough initially. I can say without hesitation that I am very guilty of this.

It is for these reasons that I have tried to summarize the literature, as well as the ideas of many experienced koi hobbyists. Even some of what I propose may find disagreement with other koi enthusiasts. But this is what makes us all grow in the hobby! This paper should. how-ever, provide you with a good starting point on areas which you may want to consider initially or changing.

The Basic Pond
Many beginners in the koi hobby begin by digging a hole in the ground, lining it with concrete (or a liner), put water in it and gradually fill it up with koi. Well, this may work for a backyard goldfish pond but it is inadequate for a koi pond. There are even koi hobbyists who had their beginnings with koi in an aquarium. However, they soon learn that such a small environment limits their growth and that koi are meant to be viewed from the top and are rather unattractive from the side. Some may disagree. saying they have a small back yard pond; only 1 to 1 '/2 feet deep, 3 by 5 feet in size and have a couple of koi in it which have lived for years. Well, this may be true; but if you hang around with the same koi hobbyists that I do. a couple of koi will never suffice, and the five inch koi you originally bought has grown into a large koi. The biological load of your new koi or growing koi will result in overcrowding and an increased load of wastes and ammonia which deteriorates the water quality. Buying new koi will also bring in diseases which your old koi may not be immune to. So now we have a small overcrowded pond with some diseased koi and our enthusiasm quickly wanes.

Next we learn that there are 14 differnt kinds(classes) of koi with some subclasses, and that no two are alike, yet we are cornpromised with this small backyard pond. The water now turns to pea-soup green; there is no means of cleaning the pond except by draining it and then worrying about the chloramines in fresh water that will kill the fish if it is put in all at once. So what can we do to this small pond so that we can:

* 1. have easy maintenance. i.e.. be self-cleaning.
* 2. keep the water both clear and clean, both for viewing of koi and for water quality,
* 3. enable us to buy more koi,
* 4. and keep them healthy and in superb condition so that they do not lose their color or luster?


The answer is that every koi pond, unlike a goldfish pond. needs:

* I. an oxygen source. i.e..a waterfall,
* 2. a purification system. i.e., a biological filter.

BIOLOGICAL FILTER
A follow-up paper is forthcoming on the "Ideal Biological Filter." For this reason, suffice it to simply explain now the purpose of Biological Filter, the Purification System. The actual design will be discussed in the next paper.

Unlike a swimming pool filter, which is to keep the water clear and clean, it is the chlorine added to the swimming pool which keeps the algae from growing on the sides of the pool and is really responsible for the clear water. In a koi pond, we cannot use chlorine and we want the fine velvet coating of algae to grow on the sides of the pond. In fact, if algae does not grow on the pond sides then there is a major water quality problem. Your koi nibble on this algae. providing nutrients. giving them their luster and color. We also want the water to be clear so that we can always see our koi, therefore something other than cholrine must keep out the unicellular algae (causes pea-soup water) and the long stringy algae. These are the purposes of the Biological Filter.

Likewise, just because the water is clear does not mean that it is healthy for the koi. In fact, the ideal water is clear with a slight greenish tint, as well as being odorless and tasteless. Your koi produce wastes:

* (1) ammonia from their urine, which diffuses, yet the water remains clear and it becomes toxic to the koi as it builds up:
* (2) solid wastes which also add more ammonia, plus toxic hydrogen sulfide, methane gas, etc. and it clouds up the water.

Other debris. as dirt,leaves, and uneaten food adds to the accumulation of toxins to the water quality.

To purify all of these wastes is the purpose of the Biological Filter. It contains a biological material for aerobic bacteria to grow upon. These bacteria metabolize and rid the pond of the ammonia and wastes. Such a biological material in the 1980s would have been pea gravel or volcanic rock. Nowadays, however, many synthetic materials are being used (brushes, foam, mattresses, bioballs. etc.). The major requirement being that it contain the most surface area to house the maximum amount of good bacteria (aerobic). As stated. these large numbers of good bacteria rid the water of wastes and keep it clean and clear.

Important points of a Biological Filter:

* 1. Ideal to be outside the pond. i.e., better to not have the koi swimming in their own wastes.
* 2. Should have at least 1/3 the surface area of the pond.
* 3. Need a means of cleaning (backwashing and/or having bottom settlement compartments to flush out accumulated debris).
* 4. According to some experts, needs twice the amount of oxygen as the koi in the pond to keep the ggod aerobic bacteria and to keep out the bad anaerobic bacteria.

And remember, just because the pond water is clear does not mean that it is healthy water.

OXYGEN SOURCE:(WATERFALL)
The oxygen source comes from water movement. A waterfall is the most efficient and appealing supplier of oxygen. A fountain also works, as does any method of exposing water to the air. However, the water surface may be so disturbed by a fountain that one cannot view the koi. The koi must have oxygen. and as mentioned, the biological filter needs even twice the amount that the koi do. They also must have oxygen 24 hours a day. When I started in koi, I put my pump running the waterfall on a timer so that it would shut off at night. Why run the waterfall at night when it was dark and you could not even see it? Well, the oxygen level drops off when there is less sunlight and the algae present always consumes oxygen at night (produces it in the daytime). Thus, it is even more important to run the waterfall at night than during the day. Of course. the correct answer is to provide oxygen for your koi and your filter 24 hours a day. A power outage of more than 12 hours will result in your koi coming to the surface gasping for oxygen and eventually dying.

What about plants providing oxygen at night? Wrong again! Plants (water lilies, hyacinths, etc.) provide oxygen during the day when there is sunlight but use up oxygen at night. Thus, plants are (1) competing with koi for oxygen at night and (2) causing stress to the koi by affecting more rapid pH changes between day and night. Plants utilize carbon dioxide during the day butexcrete it during the night. Do not get me wrong, though. One can still have a nice koi pond with an acceptable balance of koi and water plants. Most hardcore koi enthusiasts do not have plants in their ponds however, because:

* 1. the koi hide under them
* 2. they encourage the koi to spawn and lay eggs that attach to them
* 3. as the koi grow, they begin eating the plants. What are the ideal requirements of a waterfall? The longer and broader the waterfall, the greater the aeration. The larger the area of water surface broken up by the waterfall entering the pond, the better the aereation. The entrance area of the waterfall into the pond needs to be a direct drop of a few inches otherwise the water will shoot directly across the surface and:
o a. will not mix oxygen into the depths, and
o b. will roughen the water surface thereby obstructing the viewing of the koi.
* 4. The waterfall must be run 24 hours a day.

Sloped Bottom to a Bottom Drain
The last need for the basic pond is to have a bottom drain with a valve on it. The bottom should slope down to the drain so that all the debris does not accumulate in the "dead areas" in the pond. The slope should be at least 20 degrees. If you do not put a bottom drain in the pond you will wish you had. The same if you keep the pond bottom flat, as you will have to constantly clean the pond. Without the bottom drain. you can still drain your pond with a sump pump. Thus it is not crucial to have a drain and sloping bottom, but you will greatly add to your work.

The Ideal Koi Pond

Limitations on space and money are two major variables in constructing a pond. Of course, the more space and money the nicer the pond. In this section of the paper. I want to list all of the ideal items or recommendations to have a perfect pond. Of course, very few of us are going to be able or to even want to do everything which I have listed. My purpose, nevertheless is to include everything which would make an ideal pond and let the reader decide where to draw the line. The beginner will in no stretch of the imagination think that much of this is necessary. But the advanced koi keeper will wish he had done all of this and perhaps then some. Perhaps somewhere between the basic pond and the ideal pond would be your preference.

The following three points must be emphasized:

* 1. A koi pond is for koi, not for people
o a. The pond may be pleasing to the eye but may not accommodate koi
o b. A koi (carp family) is environmentally adapted to running water, not to a stagnant pond
* 2. Never build a pond without viewing other people's ponds, talking to koi enthusiasts, or going to koi club meetings.
* 3. If you have a professional build your pond, be a skeptic and ask questions, a swimming pool builder or even a pond builder may not understand the needs for koi.

Location
The main point is to put the koi pond where you can enjoy it to the maximum, the nearer the house the better. It is very important to visit your pond at least twice a day without exception. But the koi pond should not be:

* 1. where it is accessible to the public and may be vandalized:
* 2. under a tree which deposits debris into the pond:
* 3. where surrounding run-off water will drain into the pond.

ABOVE GROUND OR IN GROUND?
Koi are viewed from above, as all of their beautiful color and pattern, which make koi distinct from any other fish, is on their tops. A koi viewed from the side, as in an aquarium, is not very attractive. That same koi viewed from above may be outstanding. Thus, a koi pond ideally needs to be in the ground, so one may look down upon it.

PROVIDING FOR SURROUNDING DRAINAGE
Drainage of surrounding water may be a problem. Fertilizer from a surrounding lawn can easily wash into a pond during a rainstorm, this will kill your koi. So there must be an effort to keep drainage going away from the pond, either by

* (1) sloping the surrounding ground away from the pond.
* (2) adding a two to three inch lip or pond edge above ground level which is watertight.

THE PURIFICATION SYSTEM
As discussed under the basic pond. the purification system is the biological filter. The most important emphasis is that its size must be adequate. To reiterate, the surface area of the biological filter should be at least one third that of the surface area of the pond. Taking this to the point of being ridiculous, ideal would be that the filter should be the same size as the pond! Do I make my point? Everyone initially makes the error of having too small of a filter. A small filter will be inadequate for maintaining the water quality and your once gorgeous koi will deteriorate: you will get discouraged and want to get out of the hobby.

OXYGEN SOURCE Again, as in the basic pond. the more the water-flow, the greater the oxygenation of the water. A waterfall is the simplest and most attractive source of this oxygenation. (See the previous discussion on Basic Pond.)

SIZE
Ideally, the size of a koi pond should be as large as one can spare in the space provided. Without exception, everyone, after two to three years, finds the size of their pond inadequate. I repeat, without exception the first pond is not large enough!
Three points to remember:

* 1. Do not make it so large that cleaning the pond. catching the koi, or viewing the koi are impractical.
* 2. Leave room for the biological filter. At least one quarter of the space should be for the filter, even though probably hidden from view.
* 3. Put the pond in an ideal location for viewing, i.e., not so far from the house that you cannot keep an eye on it. Also, not in the front yard where it can be easily vandalized.

DEPTH
It is ideal to have the pond depth at least six feet at its deepest area. If this is not possible, at least go deeper than three feet. The major reason for depth is the health of your koi. There is less temperature variance during extremes in hot and cold weather, especially between day and night. Koi in deeper ponds get much more growth and bulk. Koi are physically comfortable in deep water. Shallow ponds also invite predators, i.e., blue herons, which simply walk in and spear the koi. There is no logical reason to have different levels of depth, as the koi should be able to swim unimpeded. My pond has a shallow swimway connecting two ponds: the koi tend to scrape their anal fins which becomes an entry point for aeromonas.

Shape of Koi Pond
A koi pond may be any shape which one wishes to design. The most important limiting factor is that there should always be water movement in every portion of the pond. That is, there should be no dead areas! These are areas where there is static water - great breeding grounds for serious disease-causing bacteria. Dead areas are also areas where debris collects.

Thus, in your design plan, always be sure that the water is moving in all areas of the pond, from the waterfall at one end of the pond to the oulet drain and skimmer at the other end.

Corners & the Bottom
The junction of the sides, or corners, of the pond should not be square, but should be rounded. This prevents debris from collecting in these "dead areas." Also, the bottom should never be flat. How often are you going to walk in your a koi pond? The bottom needs to slope 20 to 40 degrees toward the bottom drains, so that the wastes collect in an underlying sump or distal settlement tank.

NO SHARP OBJECTS
Please, never, never put anything sharp in the pond on which your beloved koi may injure themselves. Sure, nice rocks jutting out of the pond may look attractive, but you will soon see many cuts, laceration and bruises on the kol. This includes no sharp rocks around the edge of the pond which the koi may jump out of the water and strike. Any pipes which end in the pond water will also be a hazard to the koi.

All Pipes Need Valves
A good rule of thumb is to put a valve on every pipe in the pond. This may seem excessive, but you may later wish you had done so. One needs the ability to isolate every pipe in case of a break or malfunction. In fact. major drain pipes could use two valves in case one fails. When you design your pond, lay out all the pipes before ever proceeding, especially before cementing. Plan where to put each valve.

PIPE FOR ADDING WATER
A one half to three quarter inch pipe from a water source emptying at the top of the waterfall, hidden from view, is an ideal convenient way to add water to your pond. Flow must be controlled by valves, ideally two of them: one at the beginning of the watersource and the other at the waterfall end. This is superior to adding water with a garden hose and is less likely to result in forgetful overfilling of the pond, if left at a slow trickle. Adding fresh water in a slow trickle is tolerated by the koi. They adjust to such a trickle of water and the water first flowing over the rocks of the stram or waterfall helps to remove the chlorine by exposing it to air.

Prior to water being tainted with chlorine/chloramine, or if one is blessed with well water, it used to be recommended to have the daily ratio of fresh water to filtered to be 15 to 20% fresh - 80 to 85% filtered. Japanese breeders advise the following:

* 1. to hasten the growth of the koi increase fresh water to 25%;
* 2. for better coloring, decrease fresh water to 10%., that is used or filtered water is better.

SKIMMER
Every pond needs a means of removing surface debris. There are two set-ups which may accomplish this:

* 1. A standard swimming pool skimmer with a trap So that small koi do not get sucked in.
* 2. Or a four inch pipe vertically, whose edge is at the water surface in the pond. In either case, both need to feed into the waterpipe that takes the pond water to the settlement tank (or to the filter). As in all other pipes, it needs to have a valve in order to turn it off when the need arises.

OVERFLOW
An overflow pipe draining out into the garden. slightly higher than the skimmer level, keeps the pond water from rising to the edge of the pond and carrying the fish over the sides. One can use either a vertical standpipe or a horizontal pipe through the side of the edge of the pond, placed at the optimum height of the water level. As stated previously, this level should be six inches from the top of the pond. A grid must be placed over the horizontal pipe to avoid losing small koi through it.

Bottom Drain
As in a basic pond, every koi pond should have a bottom drain. Such a drain needs to be able to function in one or all of the following three capacities:

* 1. Simply a bottom drain with a grate over it so that one can drain the bottom water (dirtiest water) out of the pond when one desires.
* 2. Continuously take the pond water to the filter, particularly if it goes through the settlement tanks first.
* 3. Or in the case where the water going to the filter is being removed from the pond one to two feet above the pond bottom, then a sump should be beneath the bottom drain so that every morning (and evening) sump out the bottom water which contains ammonia and wastes.

Ideally, all three possibilities in one pond is best.

The following is recommended for a bottom drain:

* 1. Put at the opposite end of the pond from the water inlet. i.e., the waterfall, so that all debris flows toward the bottom drain.
* 2. Drains must be at the deepest part of the pond with the bottom sloping toward it at 20 to 40 degrees.
* 3. The minimum number of bottom drains: every 10 feet apart. Maximum would be every six feet apart.
* 4. Each drain should have a separate drain pipe, otherwise if one connects two drains to a common outlet, the effective pulling suction power is cut in half for each individual bottom drain.
* 5. Outlet drain pipes should be no less than three inches in diameter.
* 6. Drain pipe covers should be a grate or a dome. The former can be purchased, made of PVC or iron. The latter can be made from cement, using a garbage can lid as a mold and putting four 1/2 inch feet on them.

WATER OUTLET: RETURNING TO FILTER
The optimum is to remove the solid wastes returning to the filter so that the biological filter is noe overburden and can work on removing the tiny partices and invisible wates, such as ammonia. The last thing you want is to have the pond act as a settlement tank and leave all the wastes, debris and ammonia at the bottom of the pond. So they must be removed from the pond but not taken directly to the functional part of the biological filter.

There are two alternatives on where in your pond to put the water outlets, taking the pond water back to the filter. Which you use depends on if you use a sump or a settlement tank, that is, how you rid your solid wastes:

* 1. If you return pond water directly to the filter without the benefit of a settlement tank, then the best place for the outlet exiting is from the bottom half or third of the pond. In this case one must have a sump under the bottom drain and sump out the debris and ammonia collected on the bottom daily. Better yet, sump off the bottom water twice daily. This water will be brown and smell of ammonia. Sump it out until it clears (at least 30 seconds). An added safety feature: If the outlet pipe breaks, the pond will not completely drain, since the pipe is one third the way from the pond bottom.
* 2. Better yet is to have a settlement tank or two or three. Thus, the water from the pond goes through these chambers so that the wastes settle out before they reach the biological filter. In this way, debris and ammonia never get a chance to sit on the bottom of your pond if built correctly. With settlement tanks, the outlet should be on the bottom of the pond. By the pond water going to the settlement tanks before going to the biological filters, both the koi and the biological filter have the cleanest water possible at all times.

To prevent accidental pond drainage, bring the pipe from the bottom drain up about two feet at right angles before leveling off again, then going to the settlement chambers. Now if there is a break in the system there will still be two feet of water in the pond. It is best to have the capability to filter off either bottom water or the middle water, so that you may do either or both. Bottom water returning to the filter is particularly best when the nitrifying bacteria of the biological filter is low, as when starting a pond or in the hot spring months.

SUMP
Every bottom drain should have a collecting chamber. i.e.. sump beneath it to collect all debris so it may be drained out every morning, if not also evening. In the case of the pond having settlement tanks before the biological filters, then these tanks also need sumps on their bottoms. Remember, your pond is the biggest settlement chamber that you have. A sump is a means of getting the wastes out of your pond before they get to your filter, thereby improving the water quality. Bottom water contains ammonia, fish wastes, uneaten food, dirt and leaves, all of which allow the bad anaerobic bacteria to grow in your pond and filter andcause disease.

Make the sump one to two feet in diameter out of concrete, funneled down to the drainpipe. It would be ideal to put two valves on each drainpipe to prevent accidental drainage of the pond. Likewise, as indicated above, the drainpipe should be brought up about two feet at right angles from the level of the bottom to prevent accidental drainage.

STANDPIPE CHAMBER
Another alternative set-up to allow drainage of bottom water yet prevent accidental drainage is the standpipe chamber. In this system, the drainpipe is taken to a chamber the same depth and level as the pond. A pipe is inserted over the drainpipe which comes into the standpipe chamber at right angles. This removable pipe rises to just above the height of the water in the pond. Simply by removing this pipe, with no valves involved, the bottom water from the pond floods into the much smaller standpipe chamber until it reaches the height of the pond (or until the vertical pipe is placed back onto the drainpipe). This acts as a sump which has a built-in safety factor preventing accidental drainage. Each bottom drain should go separately into the standpipe chamber, each with its own vertical removeable pipe. Then there should be a pipe which drains out this water to the surrounding garden after the vertical pipes are put back into place.

SETTLEMENT TANKS
These will be discussed in a future article on biological filters, as they are to be built outside of the pond. In fact, generally they are part of the filter, so that the pond water goes through them first to allow settling out of the solid wastes. Ideally, after the water goes through one to three settlement chambers, it then goes through a mechanical filter, and finally to the biological filters.
Each settlement chamber has three requirements:
o 1. The pond water must enter the settlement tanks near the middle but leave the chamber from near the top from the opposite side.
o 2. There must be a bevel to slow down the flow of the water to allow the solids to sink to the bottom.
o 3. Each settlement tank should have a v-sloped hottom with a bottom drain tomact as a sump, thereby flushed out every morning.

WATER JETS
When I built my second pond, something all addicted koi hobbyists do, I was talked out of water jets. A mistake! Here we are taking a fish whose natural habitat is a running stream, so we should do everything possi ble to simulate the natural state in our artificial conditions. With a water current provided by jets, the koi swim more, building up their strength, thereby improving their shape (conformation), their health, and their resistance to disease. It also minimizes dead areas, plus pushes debris toward the bottom drains.

These jets are in addition to the waterfall. To make a jet, T-off a one half to one inch flexible PVC pipe from the pipe returning filtered water to the waterfall, distal to the pump. Put in a valve to control the amount of flow on each pipe going to a jet. It is ideal to have at least two jets, one 18 inches deep and one elsewhere at a deeper level. A pond four feet deep or more should have a bottom jet. In the winter, when koi are inactive, shut off the deep water jets.

The jets need to be pointed in the same direction so that water current all flows in the same direction. The experts contend that ko all tend to swim counterclockwise. therefore this is the best direction to direct the jets. Coordinate this with the waterfall so that the two are not opposing each other. Now some say that the direction of the jets should be adjustable, so some of the time run them in an opposite or clockwise direction. The feeling being that koi swimming in the same direction always will begin to get lordosis, or curvature of the spine, if not alternated.

VENTURI VALVES
A venturi valve may be placed on one of these jets for the purpose of putting more oxygen in the water. A venturi valve is the same as a water jet with an air supply pipe to cause bubbles, as in a spa. So not only do you get a jet of water but also an added abundance of air providing more oxygen for your koi.

KEEPING KOI IN
Koi tend to jump at times. This is especially true when:
o 1. Koi are new
o 2. New koi are put in the pond in the evening
o 3. Koi have parasites
o 4. Water quality is poor irritating their exteriorsor gills.

We have all gone out in the morning and found a stiff koi on the lawn. Koi can be revived even after out of the water more than an hour. I have revived koi merely by working their gills under the waterfall after finding them looking very dead, stiff and dry.

The following encourages koi to stay in the pond even if they do jump:
o 1. Keep the water level six inches down from the top of the pond edge.
o 2. Do not slope the sides of the pond but have them go straight down for at least the first two feet of depth. This prevents a running start by the koi.
o 3. Some even put a lip overlapping the edge of the pond so that if the koi do zoom along the sides and jump, they will hit the lip and stay in the pond.
o 4. If koi do jump out, they do try to flop back in.
Thus, the two factors which I recommended to keep drainage water out would act to prevent the koi from jumping back into the pond. So, you want to minimize the elevation of the pond edge, keeping the surrounding water out but still allowing an errant koi to flop back into the pond. Likewise. minimize the slop

Source : By Galen Hansen, M.D., Reprinted from KOI USA